- Camtasia
- Canvas
- Course Information Matrix
- Lecture Capture
- ORCID
- Qualtrics
- Student Tracking and Advising
- Zoom

HPC Grid Tutorial: How to Run a Job for Tensorflow
Follow these steps to run a Tensorflow job. Note: Make sure you have access to nodes with GPUs.
1. Log in to the Grid.
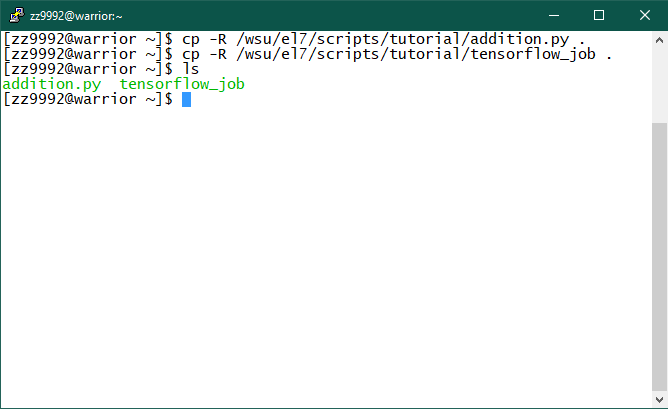
2. Copy the required contents using the following command:
cp -R /wsu/el7/scripts/tutorial/addition.py .
cp -R /wsu/el7/scripts/tutorial/tensorflow_job .
3. The file that has the job script is tensorflow_job. It contains the following script:
#!/bin/bash
# Job name
#SBATCH --job-name Tensorflow
# Submit to the GPU QoS
#SBATCH -q gpu
# Request one node
#SBATCH -N 1
# Total number of cores, in this example it will 1 node with 1 core each.
#SBATCH -n 1
# Request memory
#SBATCH --mem=5G
# Request the GPU type
#SBATCH --constraint="k40"
# Mail when the job begins, ends, fails, requeues
#SBATCH --mail-type=ALL
# Where to send email alerts
#SBATCH --mail-user=xxyyyy@wayne.edu
# Create an output file that will be output_<jobid>.out
#SBATCH -o output_%j.out
# Create an error file that will be error_<jobid>.out
#SBATCH -e errors_%j.err
# Set maximum time limit
#SBATCH -t 1:0:0
ml python/3.7
source /wsu/e17/pre-compiled/python/3.7/etc/profile.d/conda.sh
conda activate tensorflow_env
python addition.py
Note: Make sure that addition.py is in your home directory.
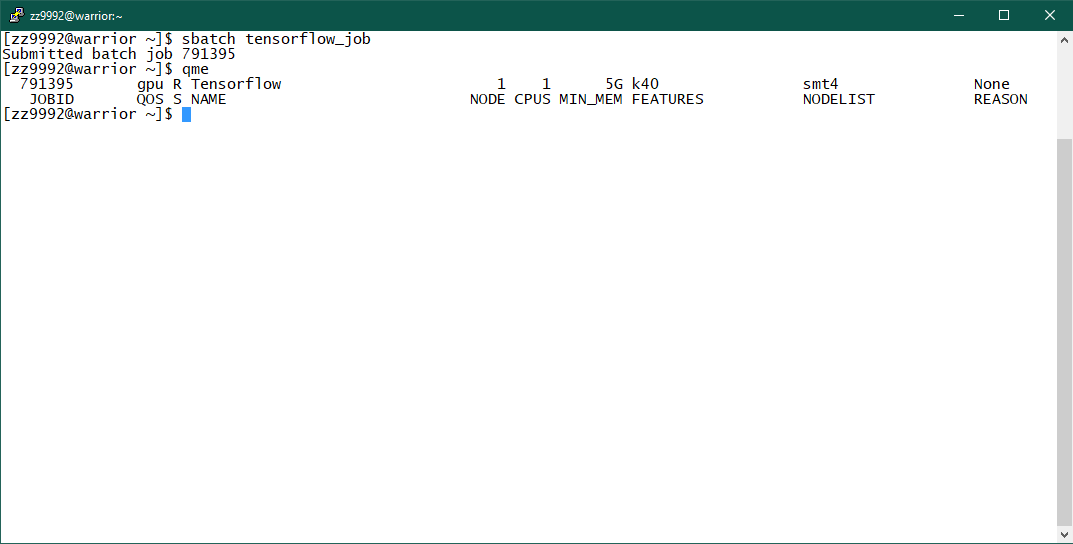
4. To submit the job, type: sbatch tensorflow_job
Once the job is submitted you can check to see job information with the following command: qme
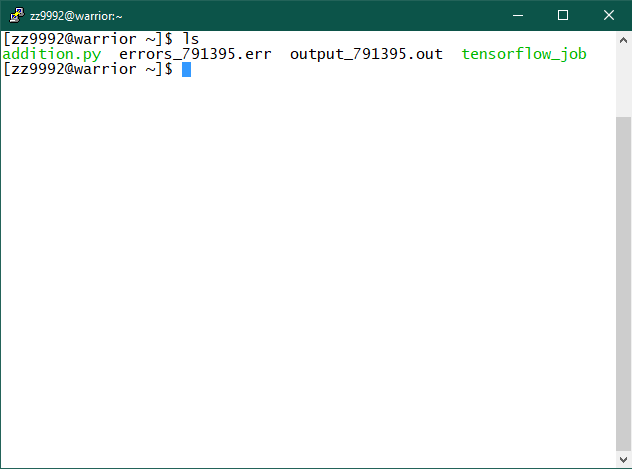
5. You will find the output and error files in your home directory once the job has completed, check the contents of your home directory by typing: ls