How can I access my department's W: drive on a Mac?
The following article provides step-by-step instructions on how to map the w:drive on a Mac (one-time and permanent) and how to mount the drive on the mac desktop.
Note: You must be connected to the VPN to access the W: drive remotely. Follow these steps to connect at tech.wayne.edu/kb/security/wsu-virtual-private-network/830.
Connecting to the departmental shared drive
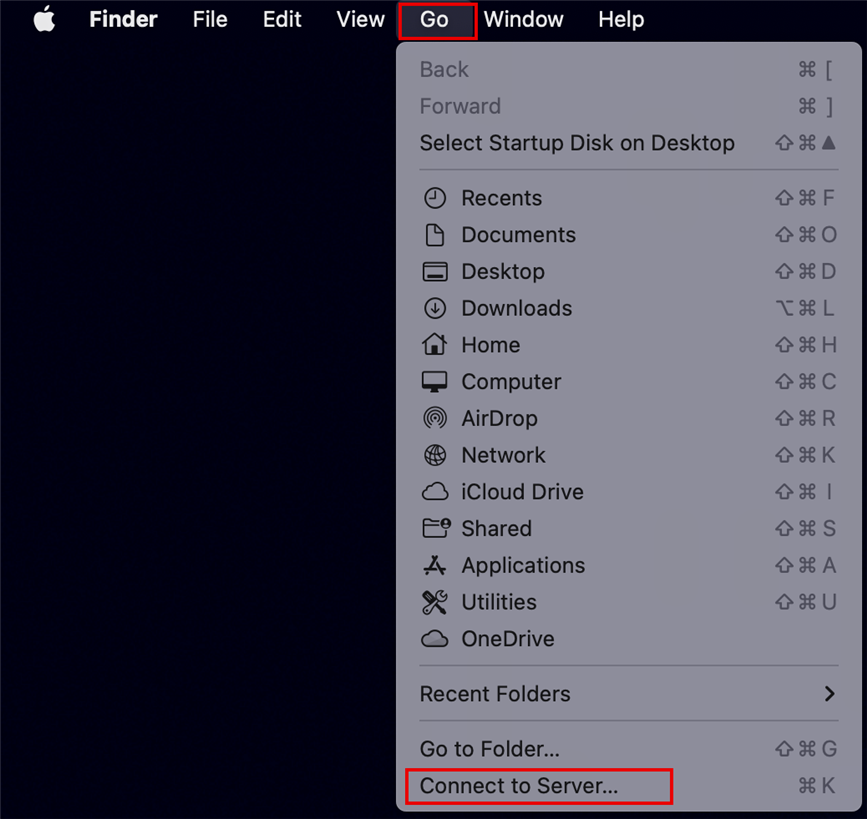
- Launch Finder in the Mac Dock.

- Navigate to the Finder menu bar on the top, selectGo, and then selectConnect to server.
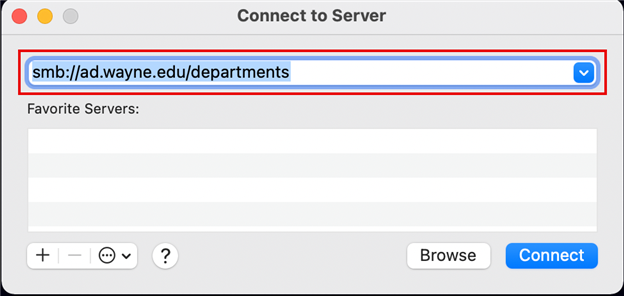
- Enter smb://ad.wayne.edu/departments in the path field and click Connect.
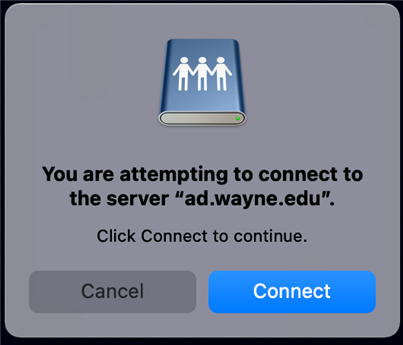
- If prompted for a confirmation, click Connect.
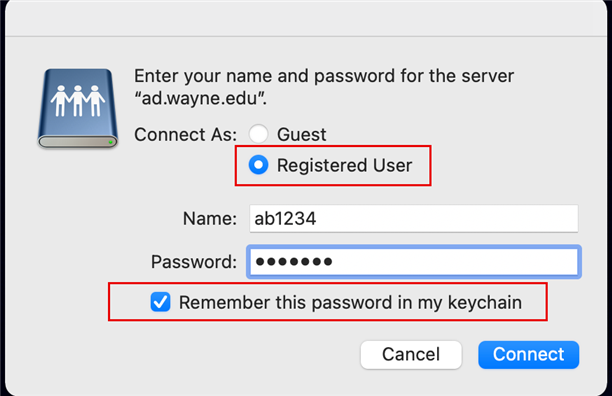
- In the login credentials window, choose Registered user, and enter yourAccess ID (do not type in the full email address)andpassword. Make sure to check Remember this password in my keychain and click Connect.
- When the departmental shared drive is mapped, the department folder window will open, and the mounted drive will appear in the Finder window sidebar.
Note: Following the above steps will allow you to connect to your w:drive. However, it will only mount the drive once. To keep it connected after a reboot, you must configure automounting via Login Items. Follow the steps below to mount the w:drive permanently. To complete this step, you must already be connected to your w:drive.
How to automount the w:drive
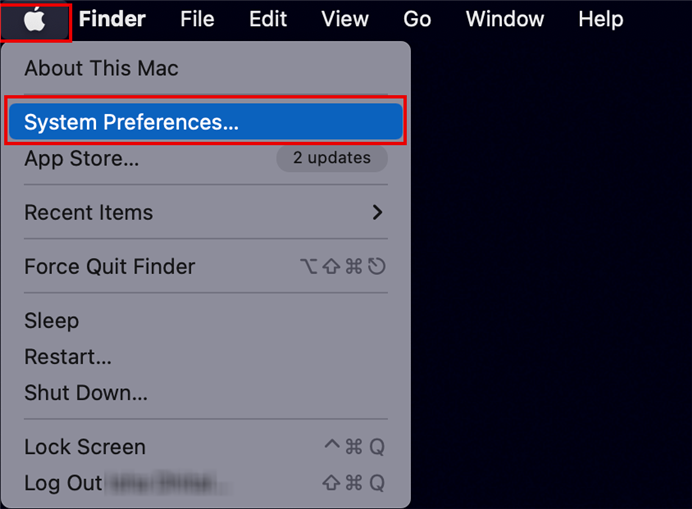
- Click on the Apple icon on the top left corner of your mac and select System Preferences....
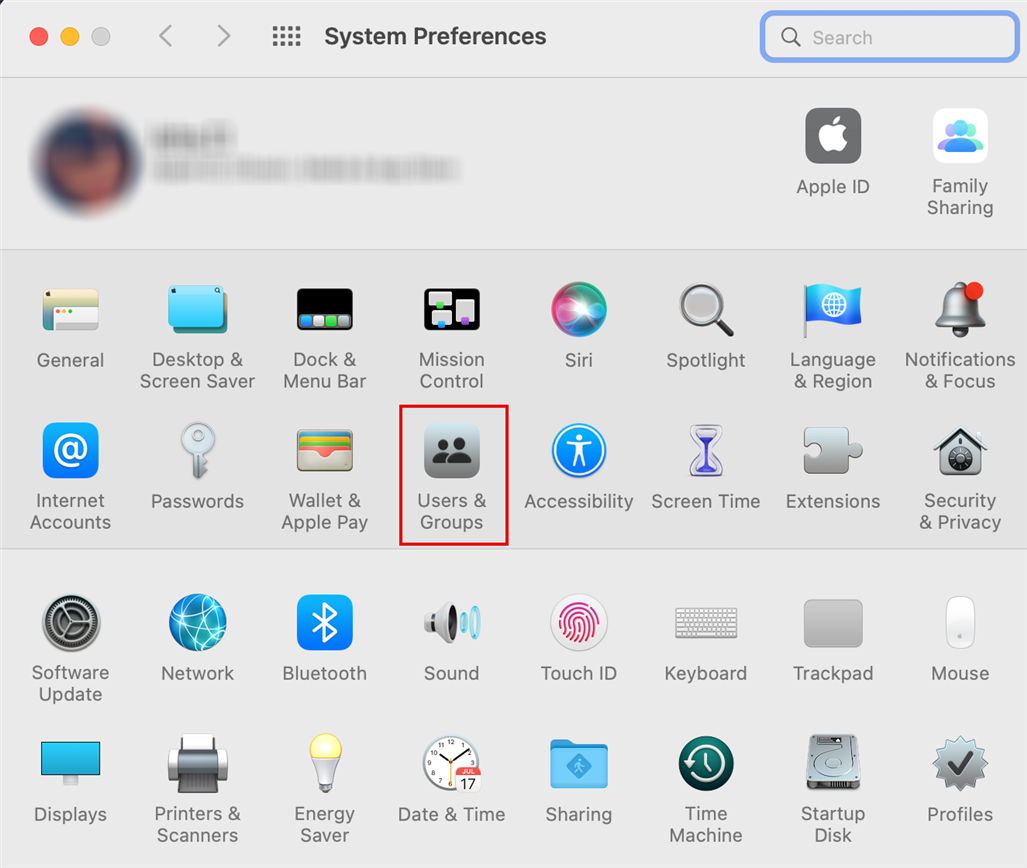
- Select Users & Accounts.
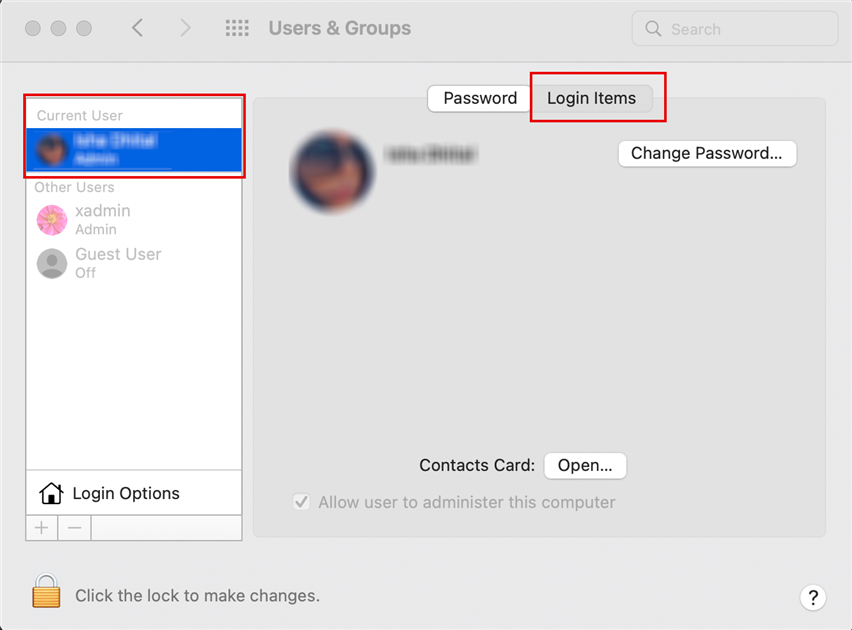
- Make sure your account is selected under Current User, then click on the Login Items tab.
- Under the Login Items tab, click on the + button to add another login item.
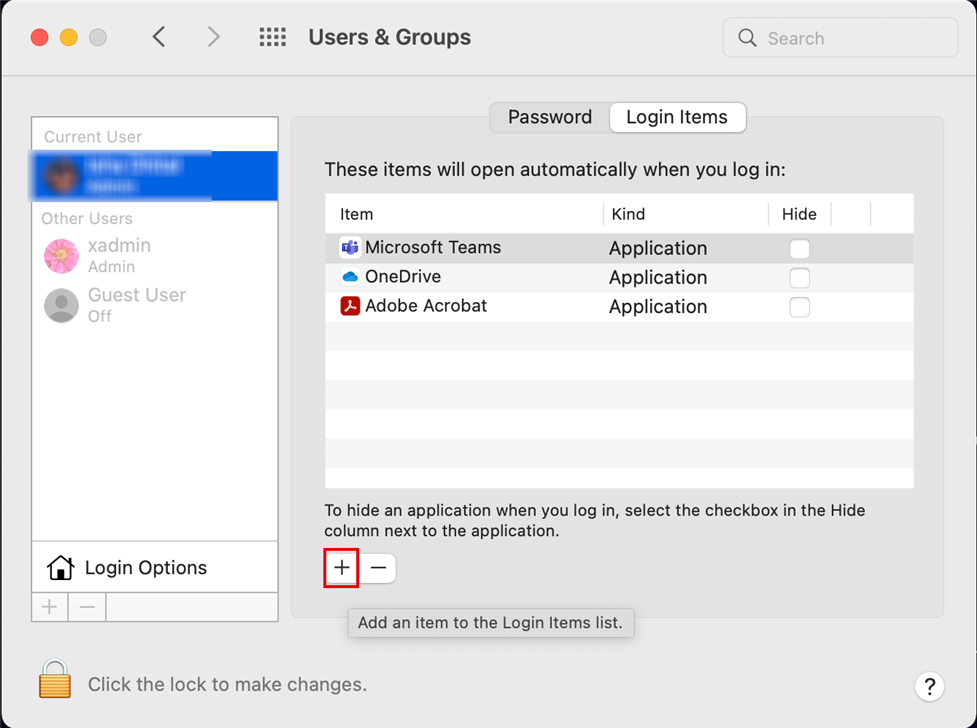
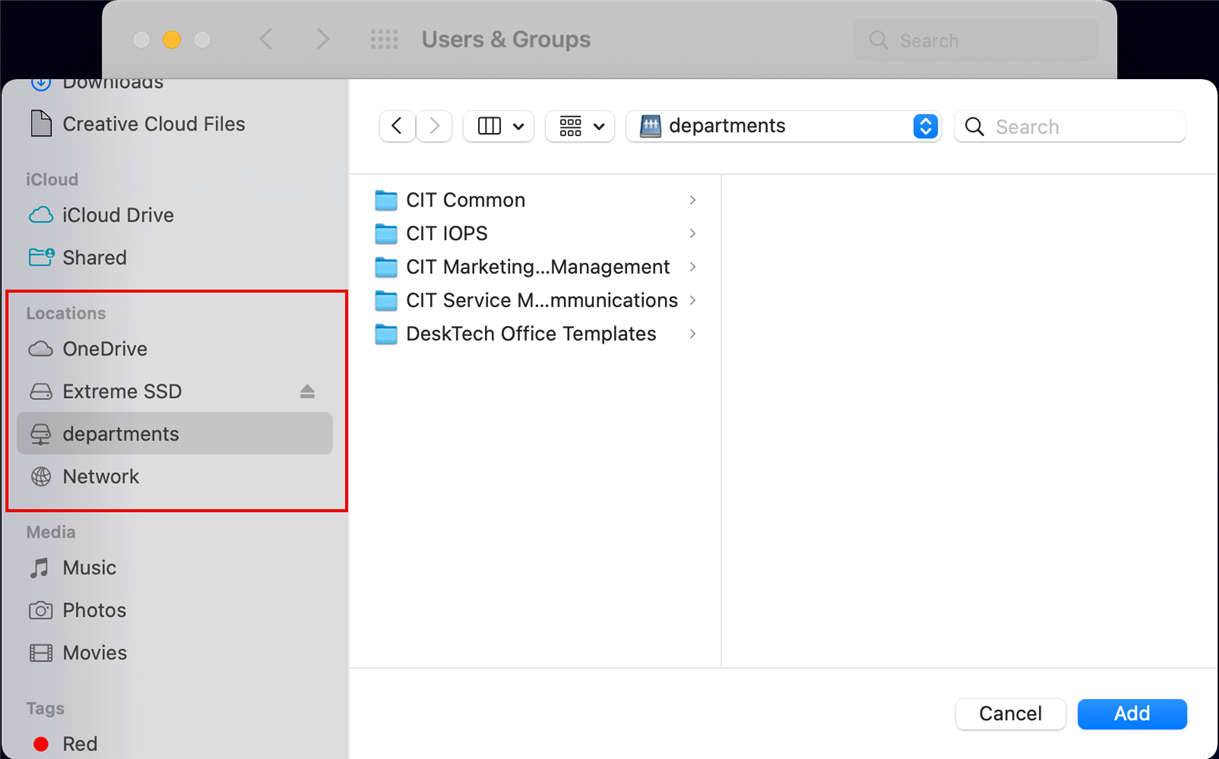
- Locate the w:drive that was just mounted and click Add.
- Close out of the System Preferences window.
- Your w:drive will now automatically connect every time you reboot.
How to add the w:drive on the desktop (Optional)
- Launch Finder in the Mac Dock.

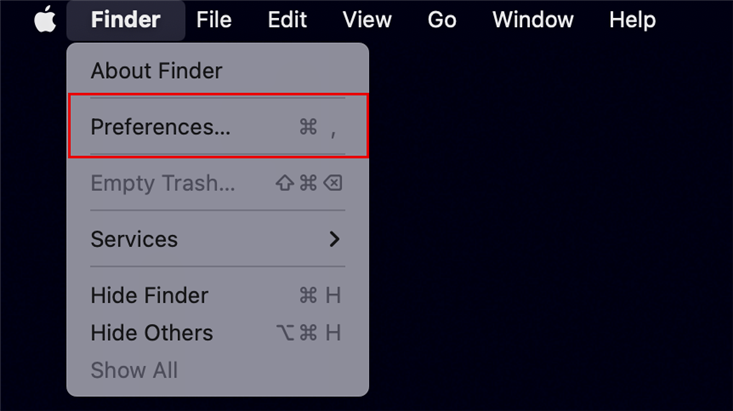
- Navigate to the Finder menu bar on the top, click on Finder, and then select Preferences....
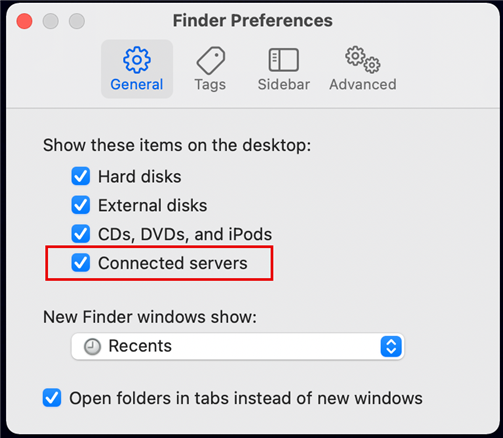
- Under the General tab, select the checkbox next to Connected Servers.
- You should now see your w:drive on the desktop.