How to Generate and Use SSH Keys with PuTTY
Follow the steps below to learn how to generate and use SSH keys with PuTTy. For detailed walkthrough, check out the accompanying video tutorial.
1. Launch PuTTYgen. You can download PuTTYgen from the official PuTTY website.
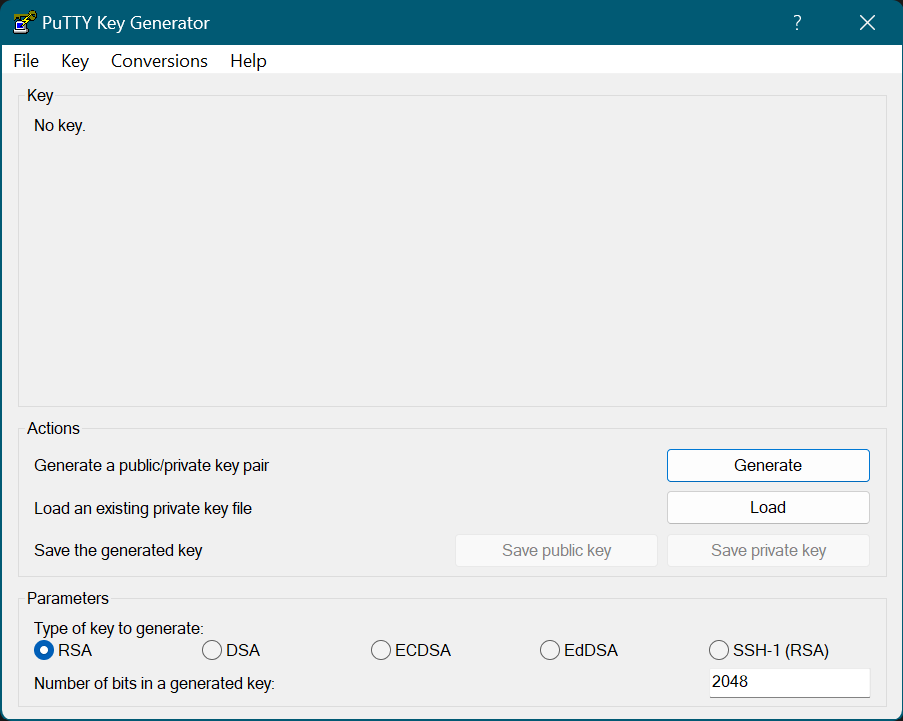
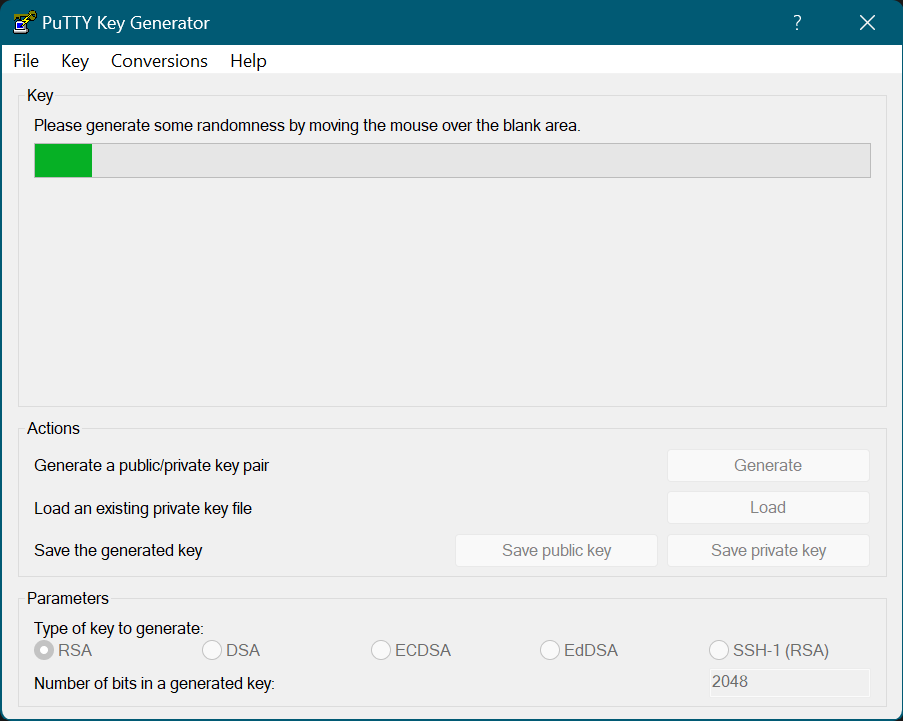
2. Under 'Actions' click Generate. Move the mouse around to generate the key.
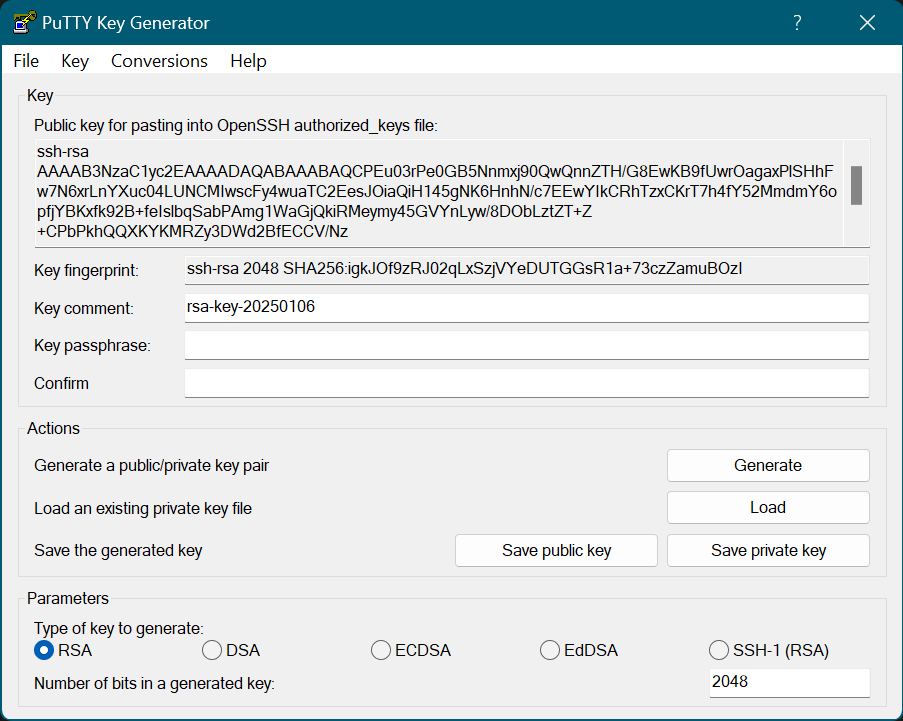
3. Create a passphrase.
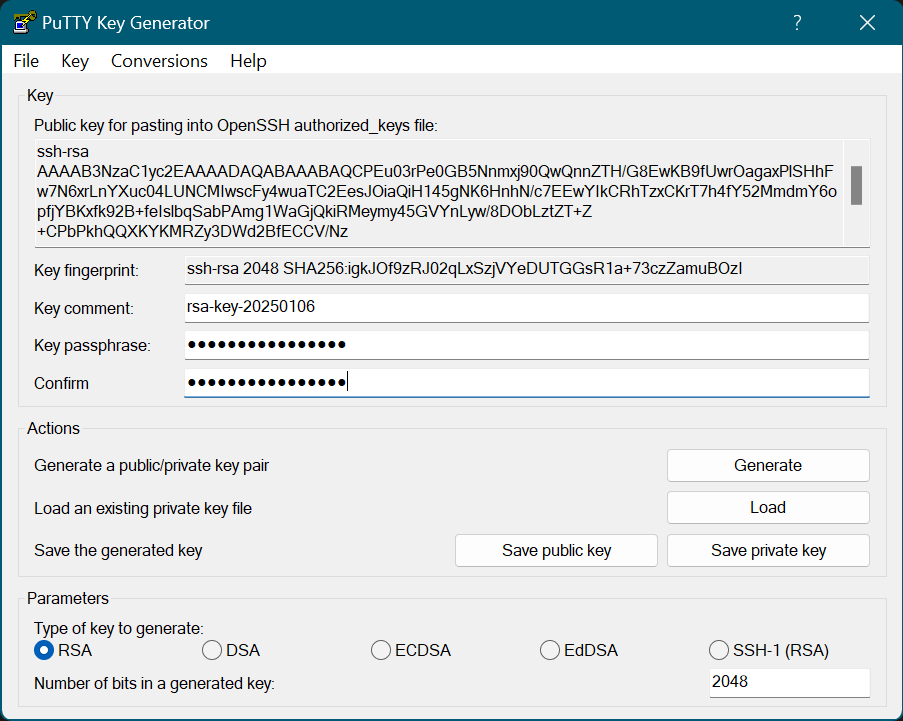
4. Under 'Actions' select Save private key. Save the file as 'id_rsa.ppk'.

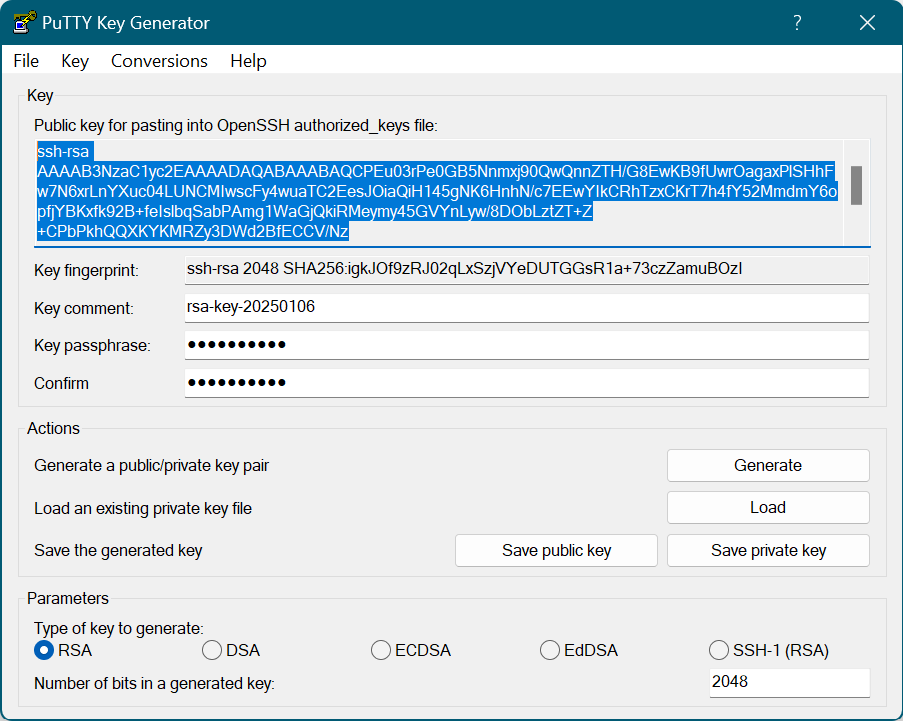
5. Highlight and copy the public key.
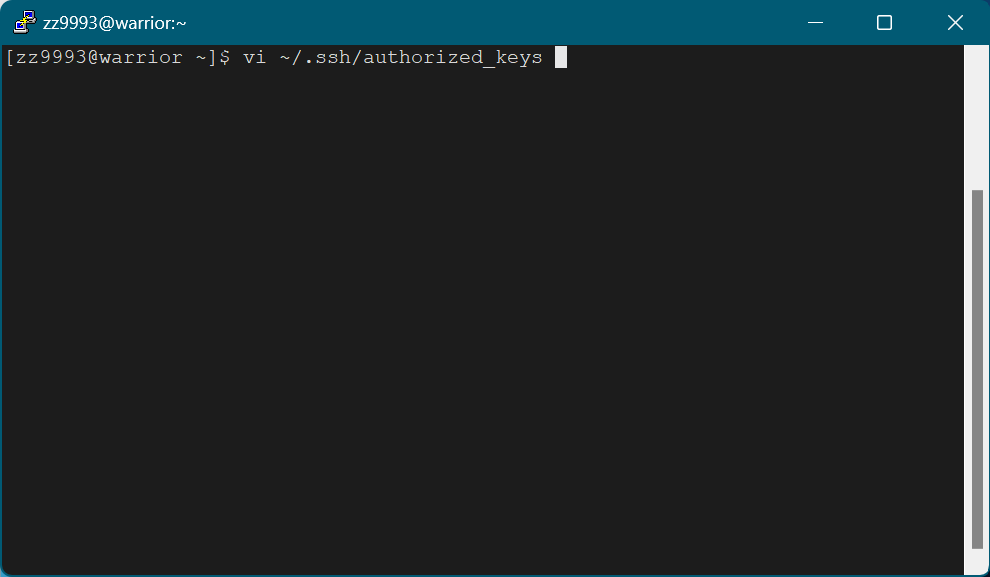
6. Launch PuTTY and log in to the Grid.
7. Create and/or open the authorized_keys file: vi ~/.ssh/authorized_keys
8. Press 'i' to insert, then right-click to paste the public key into the authorized_keys file.
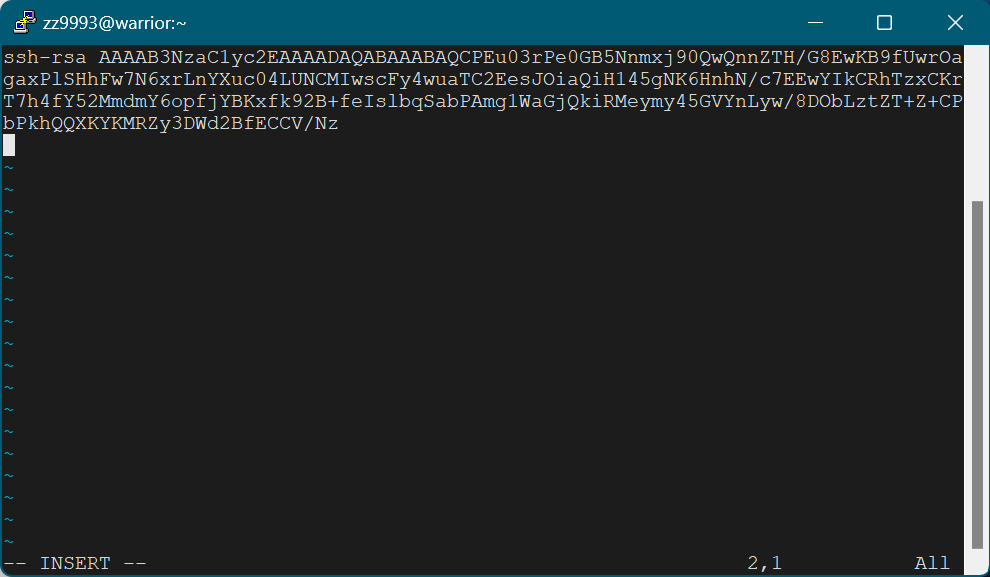
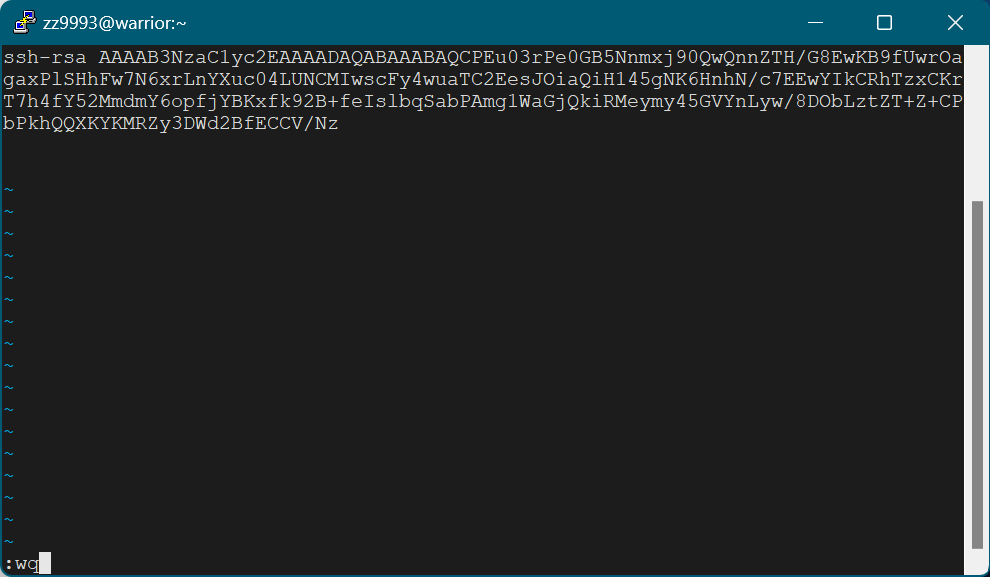
- Press Esc and type ':wq' to save and quit.
9. Logout of the Grid.
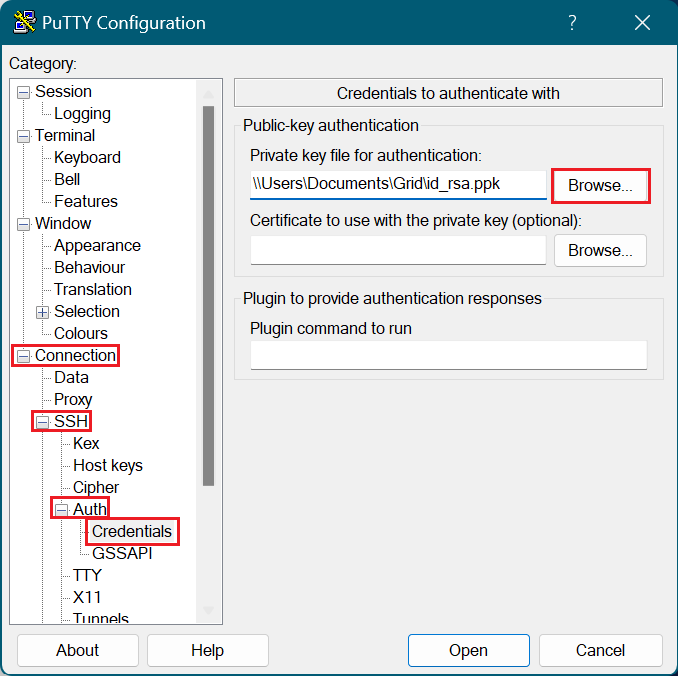
10. Launch PuTTY. Under 'Connection' click on SSH then Auth and then Credentials.
- Under 'Private key file for authentication:' click Browse and select the private key file.
11. Select Session and Save your session to save the changes.
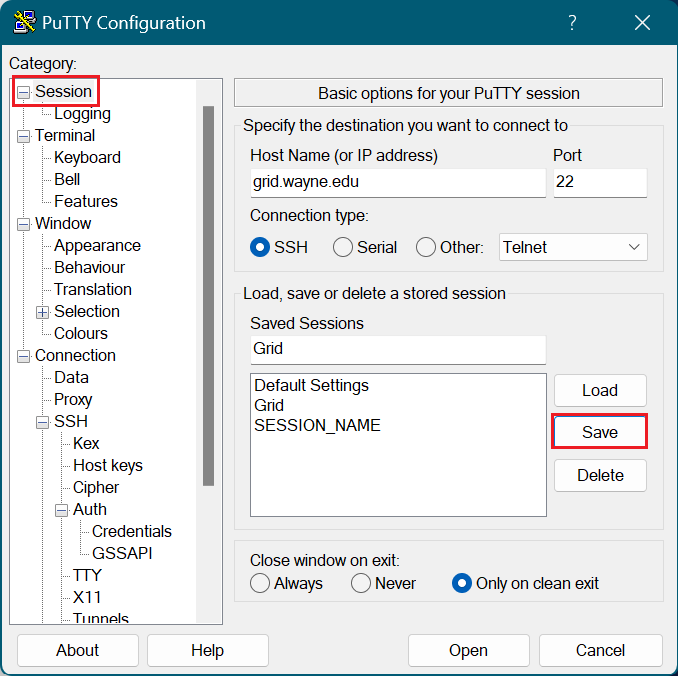
11. Click Open and enter your passphrase when prompted. You can now login using your key pair authentication!
